Printing name tags for the first time? We’ve all been there.
You open Microsoft Excel … and you find you’ve got loads of information in your spreadsheet. SO. MUCH. INFORMATION. First of all, you have to narrow down the information you need for your badge and set the headings so you can easily use them in your setup. Usually easiest to setup a new workbook, instead of messing with the master spreadsheet. Set your headers and let’s open up Microsoft Word.
Mail Merge Setup.
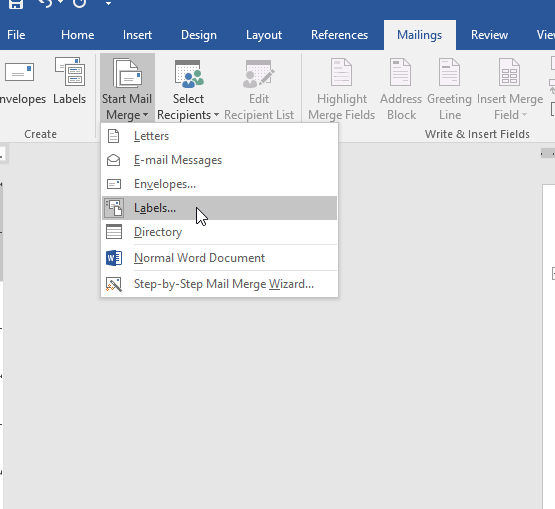
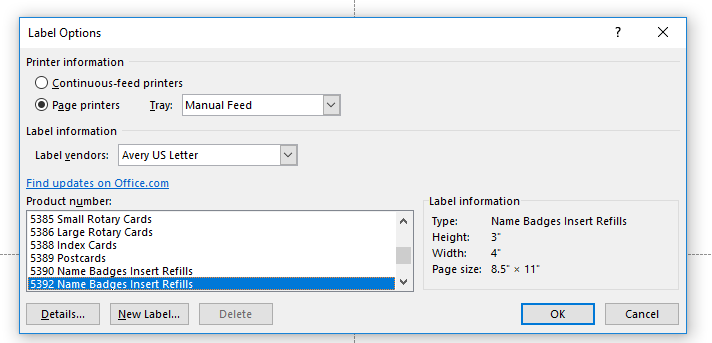
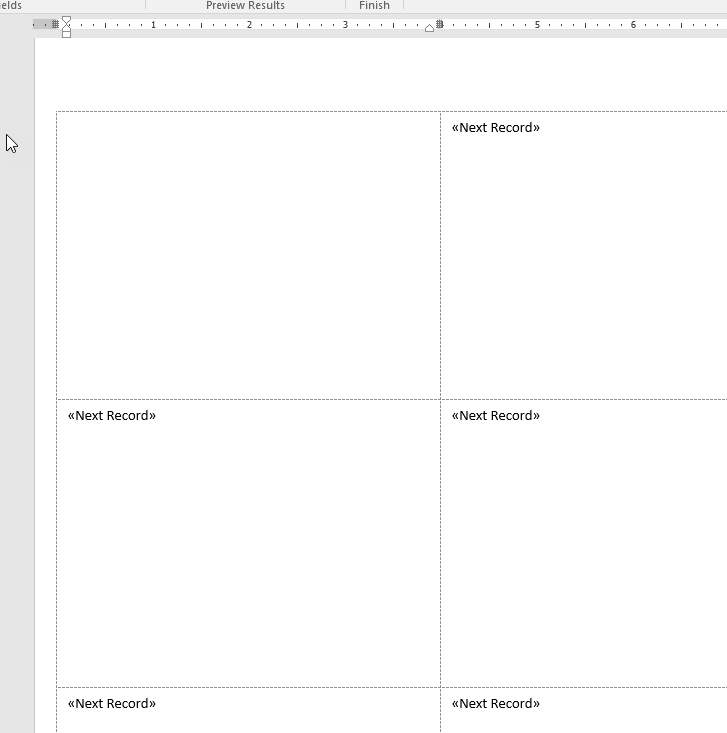
You’ve opened Microsoft Word to a good old fashioned blank template. Head on over to the mailings tab, and select “Start Mail Merge” and then select the option “Labels” (Figure 2) Select the product number “5392 Name Badge Insert Refills” which corresponds with our B-1A inserts. (Figure 3) You’ll see that your worksheet now has 6 equally divided partitions. From the “Mailings” tab you will click “Sales Recipients” drop down list and select “Use Existing List” – select your Excel file and then hit “select table”which is referring to the tabs of the spreadsheet. You should now see a similar layout to the image on the right. (Figure 4).
Bringing it all together.
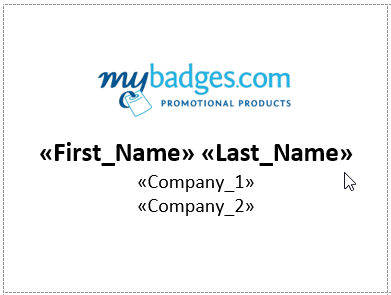
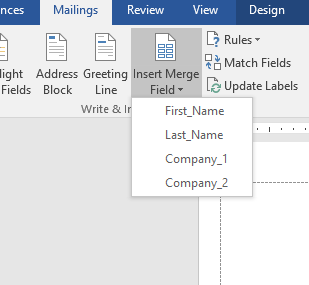
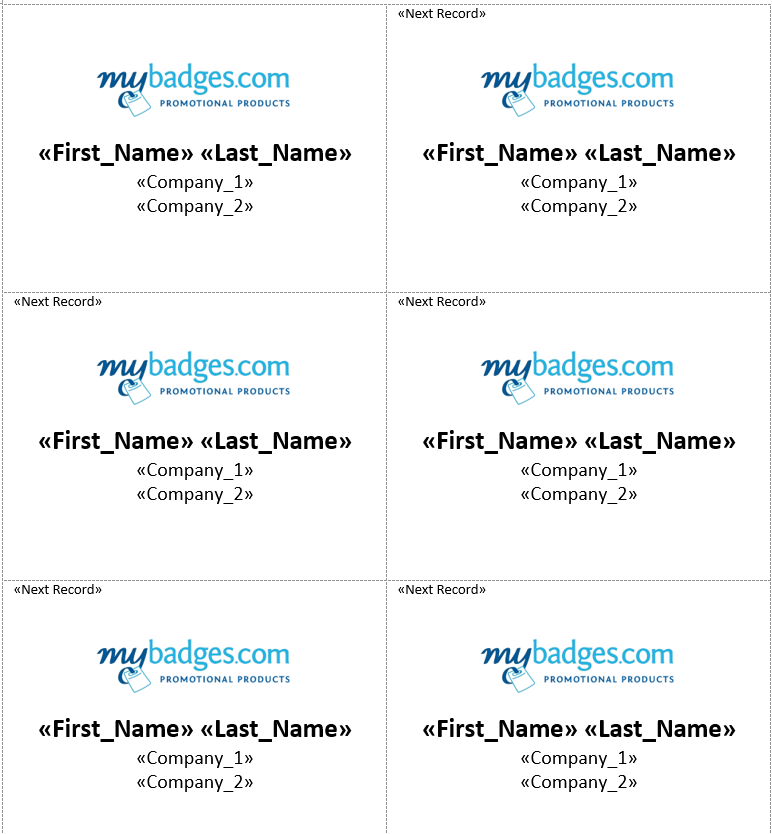
Click on “Edit Recipient List” which brings up the “Mail Merge Recipients”.You can select or deselect the names you want to include and click on OK. Now you can arrange the data one your badges to suit your preferences. You only need to alter the very first cell. Yay! In our example we are adding in our name (first and last name) as well as company (company 1 and company 2) and click on the “Insert Merge Field” drop down list (left, Figure 7) which lets you select what information from the Excel spreadsheet you want to add. Once you have added the first and last name as well as company you can move your data to the location you want. In our example we entered the text, increased the name font size, emboldened the name, and added in our company logo on the top of the badge. Copy this badge template to the rest of the badges with one click of the “update labels” button. Your name badges should now look something like the figure to your right (Figure 10). Once you update all your labels to your desired layout, elect “preview results” to see what they will look like with names and information you have specified.
Last but not least …
Double check all of your information and layout. Go ahead and finish up this little project by clicking on “Finish & Merge”. At this point you can edit your individual name badges, go straight to print, or email them to a colleague. Hope this was helpful, and below is a video walk through of the mail merge steps. Happy labelling!